Hot Apple Cider. Pumpkin everything. Boots. Scarves. And loads of candy all over the store. These are all signs that Fall is in full swing and Christmas is just around the corner. I wanted to make a decoration for my house that would easily work for every season. I've seen lots of different wreaths swirling around Pinterest lately, so I decided I needed to make my own.
I found one that I really liked on Pinterest, but it didn't have a tutorial. Thus, I used my brain and created my own tutorial to make this beauty. This cost roughly $5! Worth every penny.
Warning: Only make this project if you have about 4 hours on your hands. Also the burlap fibers will get everywhere. Plan on that.
Here's what you need:
- 1 to 1 1/2 yards burlap (I bought cheap, yet pretty white burlap at Wal Mart)
- Dollar Store wreath
- A hot glue gun
- A lot of glue sticks!
- Scissors
- Ruler
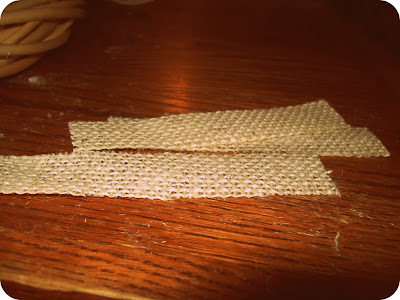
1. Cut Burlap into 1" x 5" strips
2. Fold strips into a "v" shape. Hot glue along the inside of on the fold so the "v" holds itself.
Notes:
- The back of the wreath (a.k.a. the part that will go against the wall) does not need to be covered in burlap.
- When you are finished, look at your wreath from different angles and fill any holes you missed.
- Watch a movie/t.v. show while you make your wreath.
- Pat yourself on the back when you're done!
I love looking at my new wreath! You could easily add little touches such as leaves, fabric flowers, ornaments, wheat, ect. to add a little pop to your wreath. I'm going to add a new accessory to it to correspond with the season we're in.
Enjoy!
P.S. Check out our cute costumes we wore for Jake's Youth Group Harvest Party!
Bert and Marry Poppins. Aren't we adorable? :)


