10.27.2011

Burlap Wreath


Hot Apple Cider. Pumpkin everything. Boots. Scarves. And loads of candy all over the store. These are all signs that Fall is in full swing and Christmas is just around the corner. I wanted to make a decoration for my house that would easily work for every season. I've seen lots of different wreaths swirling around Pinterest lately, so I decided I needed to make my own. 

I found one that I really liked on Pinterest, but it didn't have a tutorial. Thus, I used my brain and created my own tutorial to make this beauty. This cost roughly $5! Worth every penny.

Warning: Only make this project if you have about 4 hours on your hands. Also the burlap fibers will get everywhere. Plan on that.

Here's what you need:
  • 1 to 1 1/2 yards burlap (I bought cheap, yet pretty white burlap at Wal Mart)
  • Dollar Store wreath
  • A hot glue gun
  • A lot of glue sticks!
  • Scissors
  • Ruler
Here's what you do:

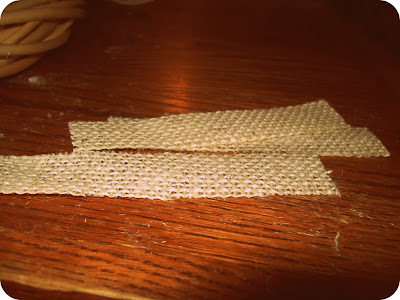
1. Cut Burlap into 1" x 5" strips


2. Fold strips into a "v" shape. Hot glue along the inside of on the fold so the "v" holds itself.


3. Glue the bottom of the "v" and place around the wreath with the open side facing up.


4. Repeat until wreath is covered on the front and the sides.


Notes:
  • The back of the wreath (a.k.a. the part that will go against the wall) does not need to be covered in burlap.
  • When you are finished, look at your wreath from different angles and fill any holes you missed.
  • Watch a movie/t.v. show while you make your wreath.
  • Pat yourself on the back when you're done!

I love looking at my new wreath! You could easily add little touches such as leaves, fabric flowers, ornaments, wheat, ect. to add a little pop to your wreath. I'm going to add a new accessory to it to correspond with the season we're in.

Enjoy!

P.S. Check out our cute costumes we wore for Jake's Youth Group Harvest Party!

Bert and Marry Poppins. Aren't we adorable? :)


10.01.2011

Our Next Project

Jake and I bought this really beautiful antique chair for only $5! We were both really excited about this find until we started taking off the upholstery. Layer after layer after layer. The chair had been reupholstered at least 5 times. Each layer covered in very old dust and tons of rusty nails. We're lucky we didn't get tetanus.


We have finally stripped it down to the bare bones and are ready to start turning it into a great new piece for our home!

More to come as soon as we finish!

9.29.2011

Browned-Butter Pumpkin Cupcakes with Cinnamon Cream Cheese Frosting


I am really not a lover of frosting. I used to hate cupcakes because they were loaded with frosting and had very little cake... my favorite part. Then I discovered the reason why I have never liked frosting is because I never had good frosting. I am convinced that most grocery store cakes/cupcakes are topped with plastic infused frosting because that's what it tastes like.


This frosting on the other hand is not only the perfect compliment to this tasty fall cupcake, but also tastes good all by itself. I actually licked the spatula when I was done! (Ok, maybe I didn't, but I should have).


My amazing sister-in-law Jenna on the other hand hates chocolate. When I saw this recipe on Pinterest for Brown-Butter Pumpkin Cupcakes with Cinnamon Cream Cheese Frosting, I knew I needed to make it for her Birthday this week! As an added bonus, she loves pumpkin and her birthday is in Autumn. Bingo!

Adapted from Baked Perfection
Makes roughly 18 cupcakes

Here's what you need:

Cupcake:

  • 3/4 cup unsalted butter
  • 1 2/3 cups all-purpose flour
  • 2 teaspoons baking powder
  • 1 teaspoon salt
  • 1/2 teaspoon ground cinnamon
  • 1/4 teaspoon ground nutmeg
  • 1/8 teaspoon ground ginger
  • 1 cup canned pumpkin puree
  • 1 cup packed brown sugar
  • 1/2 cup granulated sugar
  • 2 large eggs

Frosting:

  • 1/2 stick unsalted butter, room temperature
  • 4 ounces cream cheese, room temperature
  • 1 1/2 cups powdered sugar
  • 1/2 teaspoon cinnamon
  • 1/2 teaspoon vanilla extract
Preheat Oven to 325 F
Prepare your cupcake pan
Here's what you do:
  • Melt butter in a saucepan over medium-low heat. Stir butter occasionally until it turns a beautiful golden brown.
  • While the butter is browning, find a medium bowl to mix flour, baking powder, salt, cinnamon, nutmeg and ginger.
  • Add browned butter, pumpkin puree, brown sugar, sugar, and eggs to a large mixing bowl/kitchen aid and mix until well-combined.
  • Slowly add the floury mixture to this and stir well.
  • Pour into cupcake pans, filling each roughly 3/4 of the way.
  • Bake each pan for 20 min.
  • While cupcakes are baking, beat butter and cream cheese until the two become one... :)
  • Slowly add powdered sugar, cinnamon, and vanilla until it looks like cinnamon speckled frosting.
  • After cupcakes have melted, frost cupcakes and lick spatula at the VERY end. (This is the crucial step I forgot)
I don't have all the special tools needed to frost cupcakes, so I little trick my mom, and probably many others use.
Here is how I frosted the cupcakes:
  • Cut off a very small piece of the bottom corner of a zip-lock bag.
  • Add frosting to bag and seal the top.
  • Use the corner of the bag you cut-off as your tip.
  • Make a spiral around the top of the cupcake.
There you have it, a tasty fall treat that will brighten anyone's day and add a few inches to our waistlines!
Enjoy!

9.06.2011

Reupholstered Chair

Yes, I know my posts have been very few and far between. Since Jake and I moved a little over a month ago, we have been busy adjusting to our new lives here. Some of that business includes not really making blog-worthy food and creating fun projects at home and for Jake's youth room!  Youth group starts tomorrow, so we have to finish the room ASAP. I'll post pictures soon!

For now, I have a fun project to show you. A couple years ago my mom and I reupholstered her dining room chairs. It inspired me to update a chair my mother-in-law bought me at a cute little country sale. (p.s. She has two great blogs. One about her life, and one about her new quilting business)

Here's what it looked like before:


It was cute, but the fabric wasn't really my style. When we went to Ikea that weekend, I found the perfect fabric.

Here's what it looks like now!:


I really like the flower being off-centered. It gives it more of an artsy look. I'm thinking of making a cute yellow pillow to add a pop of color!

Enjoy!


8.14.2011

Margherita Pizza


This weekend my mom and sister came up to visit. We had a blast! One day was spent at the beach taking my sister's senior pictures, another lounging around the house, and one of the last included a trip to Trader Joe's. A couple of my favorite purchases were the Tomato Basil Marinara Sauce (We love this on pasta. I've never liked store-bought sauce, but I buy two jars every time I'm at Trader Joe's. It's that good.) and a big basil plant. The two inspired me to make a fresh margherita pizza.

Here's what you need:
-1 box Jiffy pizza mix
-Fresh basil leaves
-About 2 roma tomatoes
-Roughly 1/2 pound mozzarella cheese (I like cheesy pizza, ok?)
-Tomato Basil Marinara Sauce

Here's what you do:
-Make pizza dough according to instructions on box. (make sure to pre-bake the dough for about 3 min. before adding toppings)
-Slice tomatoes and mozzarella into thin pieces and cut basil leaves in half
-Cover pizza dough with as much marinara sauce as you like.
-Add tomatoes, mozzarella slices, and basil until pizza is covered.
-Bake according to box.

What I love about this pizza: it's fresh, the crust is thin and crunchy, and the marina adds an extra flavor that many margherita pizzas lack.

Enjoy!

8.06.2011

I Want S'more Cupcakes Please!

Sometimes on my way home from work I sing. Sometimes I reflect on the day. And sometimes I create really unhealthy food combinations like the one on this post.

I love s'mores! But since I don't have a campfire in my apartment, I have to get creative in order to enjoy the delicious combination of graham crackers, chocolate, and toasted marshemallos! This is how I created my own s'mores cupcake! It's very sweet, but oh so good! I had Jake take them to work so I wouldn't eat them all, and everyone loved them!

Here's what you need:

Graham Crust: (from All Recipes)

  • 1 ½ cups finely crushed graham crackers
  • ¼ cup sugar
  • 1/3 cup melted butter

Vanilla Cupcake Batter: (adapted from Food Network)

  • 3/4 cup self-rising flour
  • 1/2 (plus a little more) cup all-purpose flour
  • 1/2 cup unsalted, softened butter
  • 1 cup sugar
  • 2 eggs
  • 1/2 cup milk
  • 1 tsp vanilla extract


Here's what you do:

Pre-heat oven to 350 F

Grease muffin tin.

Combine all ingredients for graham crust.
Press a thin layer of crust into each tray.
Bake for 3-5 min.

Batter:
Combine both flours.
Whisk butter until smooth.
Add sugar and beat until fluffy.
Add eggs until everything is combined.
Gradually add flour mixture, milk, and vanilla alternating. Mix until well blended.
Add batter into muffin tins filling a little over ¾ full.
Bake 20-25 min.

Insert one Hershey’s square into the center of each cupcake after about 15 min. of baking. Allow to finish baking until a toothpick comes out clean.

Allow to cool.

Add a spoonful of marshmallow cream onto each cupcake. Place 3 mini mallows on top. Broil until golden. (This is what makes this treat so good)

Add a Hershey’s square on top!

Enjoy!

P.S. I also made some with chocolate gnache... You can easily do this by creating a gnache, cutting a hole into each fully baked cupcake (Don't cut all the way to the bottom!), and filling it with the gnache. This makes it more like a dessert than a s'more.

6.16.2011

Summer Sandwiches (part 1)


Yum!

I haven't even finished my last bite and I'm already blogging about this sandwich. I had a sandwich like this about 6 years ago.  It has crossed my mind several times since then, but I could not find the recipe.

Finally today I realized I had to try to recreate this sandwich to the best of my memory, and boy am I glad I did. Jake said he would pay big money to eat this sandwich and thinks we should open a restaurant just because of it.

Here's what you need:

  • 3 TBS Mustard
  • 1 TBS Mayonnaise
  • 1 tsp Dried onions
  • Garlic powder
  • 1 loaf artisan bread sliced
  • Honey
  • Virginal ham sliced
  • Havarti Cheese sliced
  • Butter
Here's what you do:
  • Combine mustard, mayonnaise, dried onion, and a couple shakes of garlic powder.
  • Butter one side of the slices of bread (for cooking)
  • Spread mustard mixture on one slice, and honey on the other slice of bread (the side without butter)
  • Fill sandwich with ham and cheese.
  • Grill sandwich until both sides are golden brown, cheese is melted, and ham is hot.
I hope you enjoy this summer (or Winter or Spring or Fall) sandwich. Be watching; another summer sandwich is on its way.

Enjoy!

6.08.2011

Welcoming

Jake and I have been looking for places to rent. So far we have seen the mediocre, the bad, and the ugly.  Where's the good?
As we have been looking around, I realized how much a front door can tell you about a house. Some are worn down, some are boring, and some are bright and inviting. One day when I get to choose the color of my front door I will pick something like these beautiful pictures!

I might have to move to another country in order to have this next door, but I wanted to show it to you anyway.
Welcome home!

6.06.2011

Summer Salad

Just looking at this picture makes my mouth water. This has got to be the best way to eat a salad. It is so simple and only requires a few ingredients. I love its sweet taste and texture.

Here's what you need:
  • Your favorite salad (I like the red/green leaf lettuce with spinach)
  • An apple
  • Walnut pieces
  • Raspberry vinaigrette dressing 

Here's what you do:

  • Prepare two servings of lettuce into bite-sized pieces
  • Dice up the apple and divide between the two salads
  • Top with walnuts and the dressing.
Such a fresh and tasty addition to any summer meal. Enjoy!

6.05.2011

Create Your Own Wall Art

Jake and I have had a canvas and a bottle of red paint sitting in our apartment for about 5 months. We had fantastic ideas for it that we never had the courage or artistic abilities to pursue. I finally decided that I had the time and inspiration to create my own unique piece of art. My inspiration....


 Here are four easy steps to making your own very unique piece of art:


1. Chose a canvas that is a good size for your wall. You don't want it so small that it is barely noticeable, but you don't want something that will consume the wall.
2. Place blue painter's tape directly onto the canvas. Be creative! Try different angles or line them up. It's really up to you. (Note: Make sure the tape is firmly pressed onto the canvas so the paint does not leak under.)
3. Paint 2 or more coats onto the canvas. (Paint the sides as well. It will look more professional that way.)
4. After the paint has dried, peel off the tape and hang your new art on the wall. So easy!

Make this project your own. Paint in two or three colors instead of one!

Enjoy!

5.11.2011

Here's to Reality

I am proud to announce that Jake and I graduated! I have never felt so proud of any other educational accomplishment. After four fun, difficult, growing, long years, we finally made it to the end and get to experience marriage without homework, student teaching, and finals week.  We are both looking forward to the rest and new experiences we are about to face.


Yesterday was the day I was dreading for the past couple months. Yesterday was the day we started our "grown-up" lives and started to embark on life without the title "student". It was filled with excitement and fear. Our families went back home, the caps and gowns were put away, and the books were put on the shelf. We now are dedicated to finding the professional jobs we have been looking for. And while I sometimes enjoy a little change, I often cringe at the thought of big changes.  I also hate looking for jobs.


In spite of all of this, I have found great comfort in some of my favorite verses.


Jeremiah 29:11- "'For I know the plans I have for you,' declares the LORD, 'plans to prosper you and not to harm you, plans to give you a hope and a future."


Matthew 6:28-34-“And why do you worry about clothes? See how the lilies of the field grow. They do not labor or spin. Yet I tell you that not even Solomon in all his splendor was dressed like one of these. If that is how God clothes the grass of the field, which is here today and tomorrow is thrown into the fire, will he not much more clothe you, O you of little faith? So do not worry, saying, ‘What shall we eat?’ or ‘What shall we drink?’ or ‘What shall we wear?’For the pagans run after all these things, and your heavenly Father knows that you need them. But seek first his kingdom and his righteousness, and all these things will be given to you as well. Therefore do not worry about tomorrow, for tomorrow will worry about itself. Each day has enough trouble of its own."


Throughout my life these verses have brought great comfort to me. But in times like this where the future is very unknown to me, I can't help but view these verses as more of a praise than a prayer. I am thankful God has the future planned and He will reveal it to us as we need to know, and I am excited that I do not have to worry about tomorrow because God will take care of us.


If you are in a similar situation, I hope you feel the same excitement that I have knowing I have little control over the rest of my life and that is ok. God will reveal something Jake and I never imagined, and I can't wait!


4.29.2011

Just Yell Louder (and other advice from 4th graders)

Thursday was my last day as a student teacher. It was a bittersweet day as I realized I had made it through a very large part of my education, but also that I am now no longer the "fun college kid that gets to come in and teach fun things".

As part of a thank you from my teacher and the students, all of the kids wrote a goodbye letter to me explaining things they liked about me and what I taught as well as advice for when I get my own classroom (please let that be this year!).

Throughout this school year I have been collecting hilarious quotes from my students, but these letters brought some of the best. This post is dedicated to my lovely fourth graders.

(Note: some spelling and punctuation have been fixed so you could understand what they said)

Dear Mrs. Zufelt,

"you were very nice to me. And it's funny when you roll your eyes."

"What advice I have for you. 1. Discipline kids if being bad. 2. If kids are good reward them. 3. Make sure to call parents if really bad. 4. Don't call parents if really good. 5 Give them a break."

The next two are from a student who apparently thinks yelling is the best way to handle students:
"Just for some pointers if they are yelling and screaming yell at them and say 'Stop or you will have detention'!!! One more thing before I make a new paragraph, tell them about us"

"If they yell at you yell at them. But don't push it too far, okay, try"

"I hope you have a huge classroom, lots of supplies, and a wonderful class just like us (good luck with that)"

This next bit of advice came from a "good" kid:
"Now, if you ever have bad kids in your class here's how to deal with it. Let the good kids do something fun when the bad kids do assignments"

"If you keep this note I know you will be the best teacher ever"

"When you become a teacher you have to do a art class using clay. I don't know why but kids like to play with clay"

"I still think it's really sad that you have to leave. But also good because your finishing college. But also sad because you'll be gone."

"I have some advice for you! I can give advice because you know I've been in school for five years."

"P.S. Kids can smell fear. Do not get scared like some teachers do. They get inside their heads and the teachers start to yell at them and lose their cool. Just do not get scared"

I'm not sure if that was advice or a warning

Finally, one of my students was very hard to reach. Throughout my time at this school I only saw him smile once (it broke my heart). I was sure that he probably did not even care that I was teaching him, but after I read his letter I realized that I was completely wrong about him.

"I will remember you for a long time. You will just be a good teacher so much. I can't change anything about you"

If this doesn't make you want to be a teacher, I don't know what could.


4.25.2011

Happy Birthday to Us!

I did not want to be selfish and dedicate a post to myself for my birthday, so instead I am dedicating this post to my old roommate who happens to share the same birthday!  Happy Birthday to Melissa!

I honestly do not remember how we became friends.  In fact I have tried over the years to figure it out.  I remember some of the first times we hung out, but I have no recollection of an awkward beginning.  My first memory is just friendship. I think that's how it should be.


Together we have survived worksamples, finals week, heartbreaks, living in the same room, educator exams, road trips, Biblical Culture and Customs, did I mention worksamples (hmm... wonder what is consuming life right now).


It is a privilege to call Melissa one of my best friends... I pray that we end up living somewhere near each other.


I could not have asked for a better roommate or friend!

P.S.  She's going to marry that red head.  Won't they have cute children some day?

4.18.2011

Subliminal Messaging


My birthday is in a week.  That's only 7 days from this very moment!  I don't know why, but I have been so excited about turning 22.  I really did not care much about 21, maybe it's because I was planning a wedding and was an RA with other things to think about.  This year is different.  I have made a point to make sure my husband knows that I am really looking forward to my birthday this year.  I don't ask for a lot... really, I just want to go to Cold Stone. Instead of just telling Jake this, I somehow decided I needed to send him subliminal messages.  Our conversations have looked a little like this:

It all started when  Jake asked me what I wanted for dinner. I told him, "Ice cream."

I have also resorted to Googling random pictures of Cold Stone ice cream while he is sitting next to me.  It's really terrible, I know.

This is my favorite. As we were driving to the store the other day we passed a lady eating a HUGE ice cream cone.  My eyes widened at the delicious site, and I quickly exclaimed to Jake (without thinking), "Wow, look at that lady eating that yummy ice cream cone! It must be her birthday."
"Subtle, Teesha."
"It just came out. I didn't even think about it before I spoke, I promise."

Maybe this post is yet another subliminal message... but who am I to know? I'm just the almost-birthday girl...

Ok.  This is getting out of hand.

4.16.2011

You Should "Chai" This!

Ah... the sweet taste of Chai.  Even when I was in elementary schoool I loved to sip on this delectable drink.  Luckily, it provides me with something to order when my husband decides to go to Starbucks (I can't really drink coffee). I have grown to love it so foundly, that I decided to make my own iced version (adapted from Martha Stewart).

What you need:
  • 1 1/2 cup chai concetrate (Oregon Chai is my favorite... I'm kind of biased though, since I live here!)
  • 1 cup half and half (Don't judge.... I'm pretty sure Starbucks uses whole cream.  That's right!  It's not called "Chai Cream" because they use low-fat milk.  See, my recipe is getting healthier and healthier by the second!)
  • Cinnamon
  • 1 1/2 cups ice (you can add more later if you want it thicker)
What you do:
  • Add chai, half and half, ice, and a couple shakes of cinnamon to a blender.
  • Blend until the ice is in little bits and pieces.
  • Serve with extra cinnamon sprinkled on top or even whipped cream (personally, I think the whipped cream always tries to one-up the chai, and I just end up hating the whipped cream... so you might want to play it safe and leave your chai naked)

From my tiny kitchen to yours!

3.30.2011

Like a chicken with its head cut off

These words are all part of idioms.  This post is dedicated to the worksample that will consume my life for the next month.

So, if the posts are a little sparse... it's because my life is currently dedicated to a cute bunch of 4th graders who need to know everything there is about idioms. While my 4th graders might think I'm a little corny, I am enjoying finding an over the top idiom to use any chance I get.

Oh, and if you haven't see WORDLE, check it out. It's now or never! :)

3.29.2011

Linguine and Asparagus

Sometimes I don't feel like cooking dinner.  Shocking, I know.

Sometimes I don't feel like eating junk food for dinner again. That's when a dish like this comes in handy!

This dish is light and delicious.  Don't let the eggs scare you off... they blend in with everything else to create a wonderful taste.  It's so easy and fresh, you'll wonder why you ever thought eating out was a good idea.
Linguine with asparagus & egg
Here's what you need: (serves 4)
  • 3/4 lb. Linguine
  • 1/2 lb. Asparagus (cut off the woody end and slice in half lengthwise)
  • 4 large eggs
  • 3 TBS butter
  • 1/4 c shredded Parmesan cheese
Here's what you do:
  • Add linguine to a salted pot of boiling water.  Cook as directed, but add asparagus in the last minute.
  • While linguine is cooking.  Poach eggs in 2 inches of gently boiling water for about 4 min.
  • When pasta is done, drain (save 1 cup of water) and place back in pot.  Add butter, Parmesan, and water.  Stir until a light sauce forms around the noodles.
  • Divide pasta and asparagus into 4 plates, and place poached egg on top.
  • Season will a little salt and pepper, and serve!
Martha Stewart always has great ideas!

From my tiny kitchen to yours!

3.27.2011

Silver Candle Holder

Remember the candle holders I showed you in this post?  Well I decided to make a $1.50 version. While it is not an exact replica, these candle holders look beautiful lighting up a dark room.

Here's what you need:

  • A vase (or 4 or 50... I made three because I like to group things)
  • 1 can silver spray paint (Make sure you get indoor paint that can be used on glass)

Here's what you do:
  • Fill vase with a grocery bag (this keeps the paint out of the inside of the vase)
  • Set vase on a flat surface that you don't mind getting paint on
  • Spray vase about 1-2 feet away.  The closer you get, the thicker the paint is.  The key is to spray light coats until you have covered the vase, but still allow light to go through.
  • Allow to dry, then add a small candle.

It's that easy! Enjoy!


P.S. My mom took these pictures! Don't they look great? You should look at her website

3.23.2011

Chai Tea and Chinese Checkers

Today I had a great lunch with one of my best friends.  We have been friends since childhood.  It all started in first grade.  I spent extra time cleaning my room and made sure my mom made my favorite hamburger helper meal because I was going to have my first friend spend the night.  When I arrived at school I ran inside to find Chelsea to make sure she could still come over.  As we were talking we bent down to look at something on the floor.  Chelsea happened to move her head up very rapidly and smacked me straight in the nose.  Needless to say my cute white shirt didn't stay white.  While it may seem like our friendship started off on bad terms, our head-banging accident didn't keep us from spending every weekend alternating between each other's houses and convincing our parents we should spend the night even on a school night.
Every time I drink a chai tea, I think of Chelsea.  We used to drink chai tea and play Chinese checkers... we thought we were pretty cool and sophisticated back then.
Love Ya, Chels!

P.S. Don't judge our current appearances by these pictures... somehow I could only find the weird, awkward pictures.

Related Posts Plugin for WordPress, Blogger...